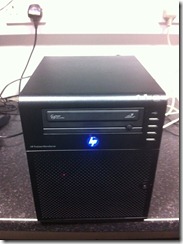
If you haven’t already seen my first two posts check them out here https://virtualisedreality.com/2010/02/14/home-lab/ and https://virtualisedreality.com/2010/08/07/home-lab-update/ after update 2 of my home lab I have been very pleased with the performance, the SSD has really changed the usability of the environment.
I have been watching Simon Seagrave’s (http://www.techhead.co.uk) updates on the HP Microserver with interest (http://www.techhead.co.uk/running-vmware-vsphere-on-an-hp-microserver) as I would like to have a second host in my environment, for two reasons, the first and obvious reason is for vMotion, DRS, HA, Update Mangager testing etc the second is to have a stable server with my primary VM’s permanently running that won’t be effected when I want to try new release, betas etc. It’s obvious from Simon’s and some other peoples posts that the Microserver isn’t the most powerful or ideal ESX host, primarily due to it’s relativly small dual core 1.3Ghz but as I only really want to run 4-5 key VM’s it should be more than enough to meet my needs.
The final decision for me was made easily because HP in the UK are currently running a £100 cash back deal, this meant that the Microserver, 4Gb of RAM (I am running with 5Gb in total for the moment) and DVD-RW Drive and USB Key pre-installed with ESXi came to less than £159 + VAT from ServersPlus after the rebate.
The Microserver was delivered the next day after ordering
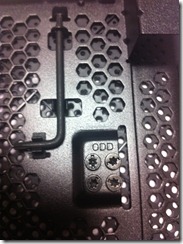
I quickly got around to assembling the relevant upgrades I had purchased. The motherboard is removed by sliding out the tray after undoing the thumbscrews at the bottom, you do need to ensure you have removed all the connectors first. Due to the small form factor it was pretty fiddly especially having large hands!
Quick thing to note as I missed them first of all but the tool for the HP torque bits is on the front door along with the screws needed for the Optical Drive and to insert your hard disk into the supplied drive caddies.
The MicroServer it self isn’t really much smaller than the ML115 and although it is 100mm smaller in height it is actually 70mm bigger in width. The biggest difference is the depth which is over 200mm smaller!
Server dimensions
Height 267 mm (10.51 in)
Width 245 mm (9.65 in)
Depth 210 mm (8.27 in)
Server dimensions
Height 367 mm (14.5 inch)
Width 175 mm (6.9 inch)
Length With bezel – 426 mm (16.8 inch)
The server was quickly up and running with the shipped ESXi USB key, I have also installed 1Tb disk alongside the factory shipped 160Gb hard disk. I have so far been using it for playing with PowerCLI, at present it is running 25 VM’s with little difficulty, although this are blank VM’s that are simply powered up, each VM has 512Mb of RAM and 1 vCPU.
I plan on moving 1 domain controller and the vCenter onto this box permanently, I am also probably going to host a XP or Win 7 desktop on here to act as a Remote Desktop for use with my iPad. I am currently debating whether to move my SSD with a VSA onto this box for my shared storage also. For the run up to Christmas it is going to be abused with me learning more about Powershell and PowerCLI. I will post an update about the final configuration in the new year, I will also probably add another 4Gb of RAM to take it up to 8Gb and a couple of Gb NICS.


SNAP!